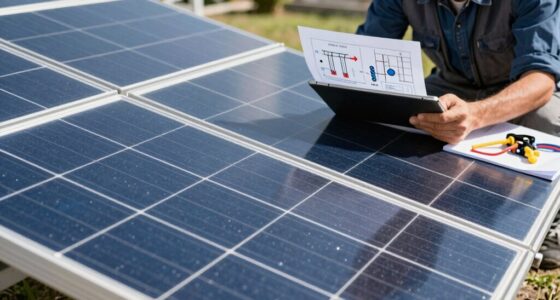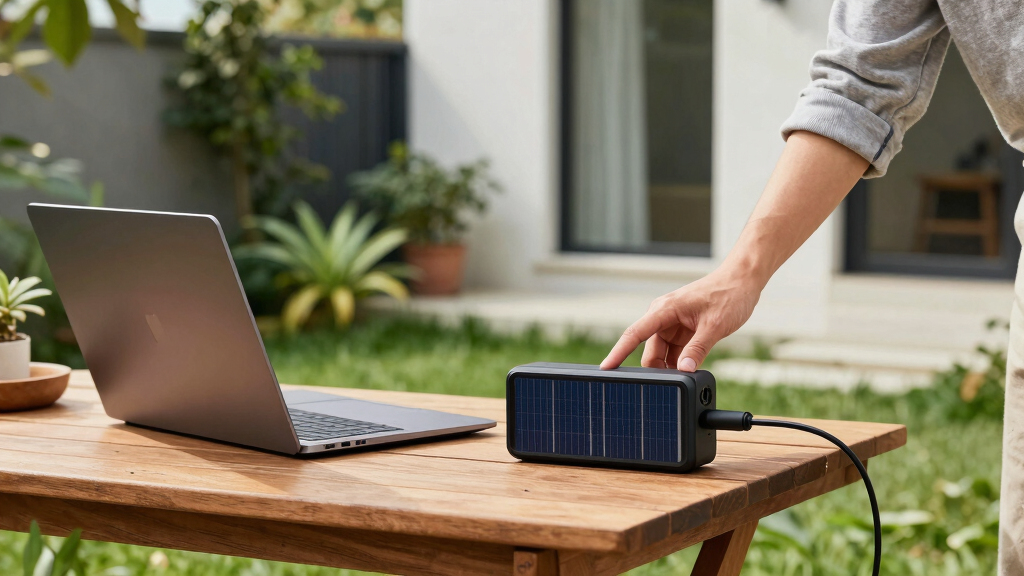
This guide will walk you through assembling a solar-powered laptop charger. You will learn to select components, connect them properly, and test the system to power your laptop sustainably. Designed for DIY enthusiasts with basic electrical knowledge, this process involves assembling a solar panel, charge controller, battery, and inverter to produce usable laptop charging power.

SOARAISE Solar Charger Power Bank – 48000mAh Wireless Portable Charger with 4 Solar Panels, Built-in Cables, Fast Charging, and F…
- ✔ Battery Capacity: 48000mAh
- ✔ Number of Solar Panels: 4
- ✔ Built-in Cables: 4
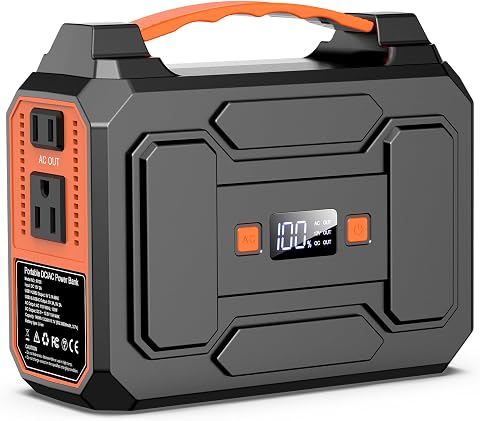
Apowking Portable Power Station 146Wh 200W Peak Solar Power Bank with AC Outlet
- ✔ Capacity: 146Wh / 39600mAh
- ✔ Peak Power: 200W
- ✔ Weight: 3.3 lbs

Portable Power Station 300W, Outdoor Solar Generator Backup Battery Pack 220Wh/60000mAh
- ✔ Power: 300W (600W Peak)
- ✔ Battery Capacity: 220Wh / 60000mAh
- ✔ Dimensions: 8.5 x 6.7 x 4.1 inches
Difficulty: Intermediate | Time: 4-6 hours
What You’ll Need
Tools & Materials:
- Soldering iron and solder
- Wire cutters and strippers
- Multimeter
- Screwdriver set
- Drill (optional)
Knowledge:
- Basic understanding of electrical circuits
- How to use a multimeter
- Soldering skills (preferred but optional)
Ensure all components are rated for the power and voltage levels you plan to use. Check compatibility between the solar panel, charge controller, battery, and inverter before purchase.

SOARAISE Solar Power Bank 48000mAh Wireless Portable Charger with 4 Cables
- High-Efficiency Solar Panels: Charges 5 times faster with 4 panels
- Large 48000mAh Capacity: Extended power for outdoor use
- Multi-Device Compatibility: Supports 7 devices simultaneously
As an affiliate, we earn on qualifying purchases.
SOARAISE Solar Charger Power Bank – 48000mAh Wireless Portable Charger with 4 Solar Panels, Built-in Cables, Fast Charging, and F…
<p>The <strong>SOARAISE Solar Charger Power Bank</strong> stands out for its enormous 48000mAh capacity, making it ideal for extended outdoor use. Its four solar panels significantly improve charging efficiency in sunlight, a key advantage over single-panel models. The built-in cables, including wireless charging, add convenience, especially when managing multiple devices. Compared with smaller options, it offers longer usage times but comes with increased weight, which may affect portability. Solar charging speed remains dependent on sunlight, so it’s best suited for sunny environments.</p>
Pros:
- High-capacity 48000mAh battery for prolonged use
- Four solar panels for faster outdoor charging
- Multiple output options including wireless charging
- Waterproof, shockproof, and dustproof for rugged outdoor conditions
Cons:
- Heavy and less portable due to high capacity
- Solar charging speed varies with sunlight conditions
- Limited wireless charging device compatibility
Best for: Outdoor enthusiasts needing extended power for multiple devices during camping or long trips
Not ideal for: Lightweight travelers or those with limited space who prioritize portability over capacity
Bottom line: A top-tier choice for outdoor adventurers needing extensive power, despite its weight and solar speed limitations.
“A top-tier choice for outdoor adventurers needing extensive power, despite its weight and solar speed limitations.”

Portable Power Station, 146Wh 100W Solar Powered Power Bank with AC Outlet
- High Capacity Power Bank: 146Wh/39600mAh for multiple devices
- Lightweight and Portable: Weighs only 3.3lb, fits in backpack
- Multiple Output Options: 7 outlets including AC, USB, DC
As an affiliate, we earn on qualifying purchases.
Apowking Portable Power Station 146Wh 200W Peak Solar Power Bank with AC Outlet
<p>The <strong>Apowking Portable Power Station</strong> offers a compact 146Wh capacity, making it much lighter at just 3.3 lbs. It provides multiple outlets, including AC, USB, and DC, making it versatile for various devices, from laptops to small appliances. While it lacks a built-in solar panel, its compatibility with external solar panels makes it a flexible choice for those who already own or plan to buy solar recharging solutions. It’s less suitable for high-power devices but shines in emergency and camping scenarios where portability is key.</p>
Pros:
- Lightweight and portable at 3.3 lbs
- Multiple charging options including solar, AC, and car
- Dual LED flashlight with emergency modes
- Safe with advanced battery management system
Cons:
- Requires additional solar panels (not included)
- Limited to 100W rated power for AC outlets
- Smaller capacity may be insufficient for extended high-power use
Best for: Campers and travelers who need a lightweight, multi-outlet power source with solar recharging flexibility
Not ideal for: Users needing high-capacity or high-wattage output for demanding devices
Bottom line: Excellent for portability and versatility, best suited for casual outdoor use with supplemental solar panels.
“Excellent for portability and versatility, best suited for casual outdoor use with supplemental solar panels.”
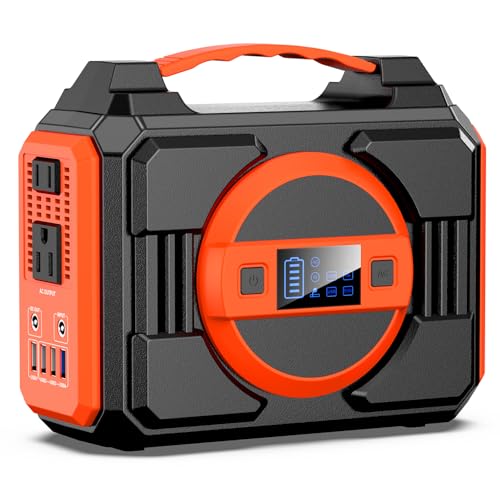
Portable Power Station 300W, 220Wh Solar Generator Backup Battery Pack Bank
- Compact and Lightweight Design: 8.5 x 6.7 x 4.1 inches, 5 lbs
- High Capacity Battery: 220Wh/60000mAh for multiple devices
- Multiple Output Ports: 7 outlets including AC, USB, and DC
As an affiliate, we earn on qualifying purchases.
Portable Power Station 300W, Outdoor Solar Generator Backup Battery Pack 220Wh/60000mAh
<p>The <strong>Portable Power Station 300W</strong> offers a solid 220Wh capacity, capable of charging up to 7 devices simultaneously, including laptops. Its compact size and weight of 5 lbs make it suitable for camping, emergencies, or home backup. It supports solar recharging, but the actual speed depends on the solar panel used. With safety features like BMS and a pure sine wave inverter, it ensures safe operation. It’s ideal for users needing a reliable, multi-device compatible power source in various outdoor settings but isn’t designed for high-wattage appliances.</p>
Pros:
- Compact and lightweight at 5 lbs
- Supports multiple devices simultaneously
- Safe with advanced BMS and inverter
- Multiple recharging options including solar
Cons:
- Supports devices under 300W, not for high-wattage appliances
- Solar recharging speed varies with panel type
- Limited capacity for large or high-power devices
Best for: Outdoor users needing a balance of capacity, portability, and device compatibility
Not ideal for: Power users with high-energy appliances or requiring continuous high wattage
Bottom line: A versatile, portable power station that balances capacity and mobility, suitable for most outdoor and emergency needs.
“A versatile, portable power station that balances capacity and mobility, suitable for most outdoor and emergency needs.”
As an Amazon Associate we earn from qualifying purchases.
Before You Start
Verify local sunlight conditions and plan to install the solar panel where it receives maximum direct sunlight. Keep safety precautions in mind when working with electrical components and soldering equipment. Gather all tools and parts before beginning to avoid interruptions.
Step-by-Step Instructions
Step 1: Select and position the solar panel
Choose a solar panel with at least 50W capacity, rated for your voltage system (12V or 24V). Mount it in a location with maximum direct sunlight exposure, preferably facing south in the northern hemisphere or north in the southern hemisphere. Secure it firmly using brackets or mounting hardware.
Tip: Use a tilt mount to optimize sun exposure throughout the day.
Check: The panel is securely mounted in a location with unobstructed sunlight, and multimeter confirms voltage output during peak sunlight.
Step 2: Connect the solar panel to the charge controller
Use appropriate wiring to connect the positive and negative terminals of the solar panel to the corresponding inputs on the charge controller. Tighten connections securely and verify polarity before powering on.
Tip: Double-check polarity with a multimeter before connecting to avoid damage.
Check: Multimeter shows voltage output from the solar panel at the charge controller input, indicating proper connection.
Step 3: Connect the battery to the charge controller
Wire the battery’s positive and negative terminals to the designated battery output terminals on the charge controller. Confirm polarity and ensure all connections are tight.
Tip: Incorporate a fuse or circuit breaker close to the battery to prevent overloads.
Check: Multimeter confirms battery voltage, and the charge controller indicates proper charging status.
Step 4: Wire the inverter to the battery
Connect the inverter’s positive and negative input terminals directly to the corresponding terminals on the battery. Use thick gauge wire suitable for the current load and secure connections tightly.
Tip: Avoid loose connections, which can cause sparks or poor performance.
Check: Multimeter shows the correct voltage at the inverter input; inverter powers on without errors.
Step 5: Test the system with a dummy load or device
Plug a compatible device (e.g., a laptop charger or dummy load) into the inverter output. Turn on the inverter and observe if the device receives power.
Tip: Start with a low-power device to prevent overload during initial testing.
Check: Device powers on steadily, and the inverter displays normal operation indicators.
Common Mistakes to Avoid
- Connecting the components with incorrect polarity. — Always verify polarity with a multimeter before connecting; double-check markings.
- Using an inverter that does not produce a pure sine wave. — Select a pure sine wave inverter suitable for sensitive electronics like laptops.
- Overloading the system with a power demand beyond capacity. — Calculate total power consumption and choose components with sufficient wattage ratings.
- Omitting safety devices like fuses or circuit breakers. — Install fuses or circuit breakers on each power line to prevent damage or fire.
Troubleshooting
Problem: The system does not produce power or the laptop does not charge.
Solution: Check all wiring for proper connections, verify component ratings, and test voltage at each stage with a multimeter.
Problem: The inverter makes noise or shuts down unexpectedly.
Solution: Ensure the inverter is not overloaded, check the battery voltage, and confirm secure connections.
Problem: Battery voltage drops rapidly or does not charge.
Solution: Test the solar panel output, verify charge controller settings, and confirm battery health.
What Success Looks Like
The solar-powered charger supplies stable 19V (or appropriate voltage) output to your laptop, with the system maintaining voltage levels during operation. The system operates reliably in sunlight, and the laptop charges without interruptions or errors.
Next Steps
Monitor the system regularly for performance and safety. Clean solar panels periodically to maintain efficiency. Upgrade components if more power is needed or if system performance degrades. Disconnect components before making modifications or performing maintenance.
Frequently Asked Questions
Can I use any solar panel for this system?
Use a solar panel rated for at least 50W and compatible with your charge controller voltage. Higher wattage panels can increase charging capacity but require larger wiring and components.
Is a pure sine wave inverter necessary?
Yes, for sensitive electronics like laptops, a pure sine wave inverter provides cleaner power and prevents potential damage.
How long will the system run on a full battery?
The runtime depends on your laptop’s power consumption and battery capacity. For example, a 12V 20Ah battery can power a 60W laptop for approximately 3-4 hours.
Can I expand the system later?
Yes, you can add additional solar panels, larger batteries, or higher-capacity inverters, provided all components remain compatible and rated for the increased load.