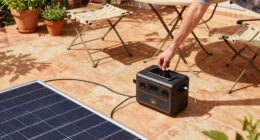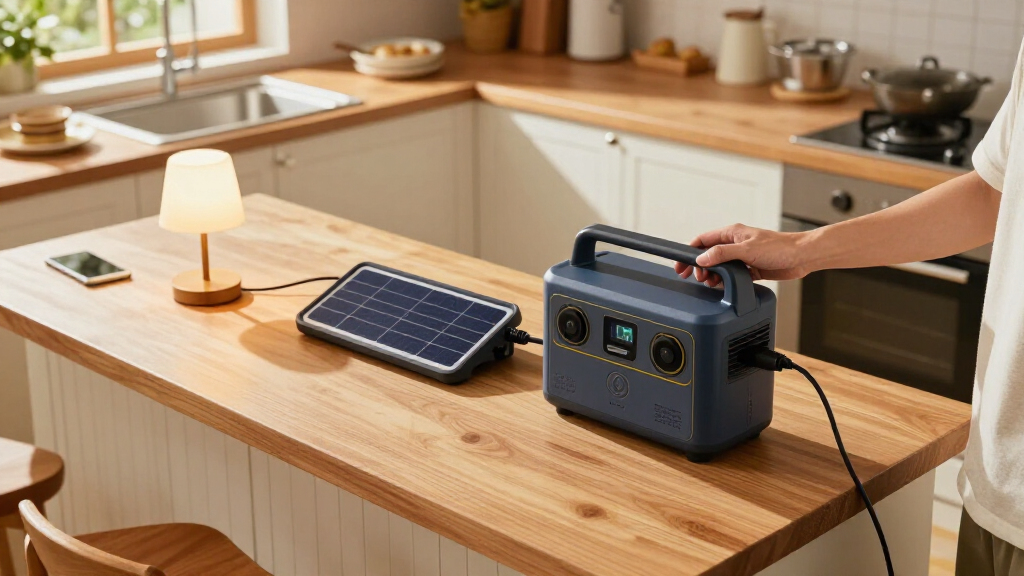
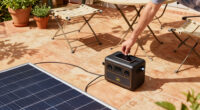
This guide helps beginners set up and test a portable solar backup power station for selected household essentials, such as phones, lights, a router, or a medical device. You will estimate your power needs, check that the station and panels are compatible, connect them safely, and confirm the system can run your intended load. Plan for about 1-3 hours of setup and testing, plus however long charging takes in available sunlight.

Get backup power and energy gear delivered free — and shop member deals
- Fast, free delivery on millions of items
- Access to Prime Big Deal Days deals on October 6–7
- Prime Video, Amazon Music and more included
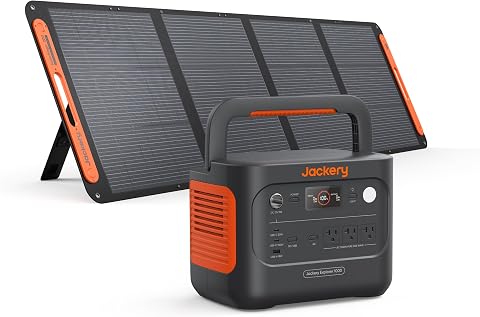
Jackery Solar Generator 1000 V2 with 200W Solar Panel
- ✔ Capacity: 1,070Wh
- ✔ AC output: 1,500W
- ✔ Surge peak: 3,000W

Jackery Explorer 300 Portable Power Station, 292Wh
- ✔ Capacity: 292Wh
- ✔ Rated output: 300W
- ✔ Peak output: 600W

ZeroKor 300W Portable Power Station with 60W Solar Panel
- ✔ Maximum output: 300W
- ✔ Solar panel: 60W monocrystalline, foldable
- ✔ Panel conversion efficiency: 20.5%
A portable power station is a battery with built-in power outlets and charging inputs. It is not automatically a whole-house backup system. Do not connect it to house wiring or a wall outlet unless the equipment and installation method are specifically designed and approved for that purpose.
Difficulty: Beginner | Time: 1-3 hours, plus charging time
What You’ll Need
Tools & Materials:
- Portable power station with a solar charging input
- Solar panel or panels compatible with the station
- Manufacturer-approved charging cable and adapters
- Device labels or manuals showing wattage, if available
- Paper or a phone calculator for estimating energy use
- Dry, stable outdoor area for the panels
Knowledge:
- Basic ability to read product labels and follow equipment manuals
- Understanding that watts describe power and watt-hours describe stored energy
Check the manuals for the station and panels before connecting anything. Confirm the station’s solar input voltage range, maximum solar input wattage, connector type, and polarity. The panel array must remain within those limits. Use only cables and adapters approved for the equipment; never force a connector or join exposed wires. Keep equipment dry unless its rating specifically allows outdoor exposure. Allow extra time if the battery needs its first charge or if sunlight is limited.
Jackery Solar Generator 1000 V2 with 200W Solar Panel
The Jackery Solar Generator 1000 V2 is the most capable system in this comparison for buyers who need more than phone charging during an outage. Its 1,070Wh capacity and 1,500W AC output give it substantially more room for compatible appliances and several devices at once than the Explorer 300 or ZeroKor, both limited to 300W output. A 3,000W surge peak provides brief startup headroom, but buyers still need to check the requirements of the specific appliance they intend to run.It also makes the simplest solar-ready package: a 200W panel is included, rather than leaving panel selection to the buyer as the Explorer 300 does. That does not make solar recharging instantaneous or guaranteed; available sunlight and conditions affect real-world charging. The 23.8-pound station is also considerably heavier than the compact 300W choices, so it is better suited to a vehicle, home backup spot, or campsite than frequent long walks.The LFP battery is specified for over 70% capacity after 4,000 charge cycles, and app-controlled modes include a quiet overnight setting. The advertised one-hour full charge requires emergency charging to be enabled in the app; the default is 1.7 hours. That extra setup and the separate shipping of the station and panel are worth noting. Compared with the smaller Jackery, this bundle is the clear capacity upgrade, but it is not the right pick if minimal weight is the main priority.
Pros:
- 1,070Wh capacity and 1,500W AC output exceed the two 300W alternatives.
- Includes a 200W solar panel for a ready-to-use solar bundle.
- LFP battery is specified for over 70% capacity after 4,000 charge cycles.
- Multiple ports and app-based charging modes, including a quiet overnight option.
Cons:
- At 23.8 pounds, it is much less portable than the Explorer 300.
- One-hour AC charging requires enabling emergency charging in the app.
- The station and solar panel ship separately, and solar recharge depends on conditions.
Best for: Households and campers who need more portable capacity and AC output for compatible appliances, and want a solar panel included.
Not ideal for: Buyers who need a lightweight station to carry far, or who expect a portable panel to provide whole-home or uninterrupted solar backup.
Bottom line: We rank it first for its combination of the lineup’s largest battery, strongest AC output, and included 200W panel, provided its weight suits your backup plan.
“We rank it first for its combination of the lineup’s largest battery, strongest AC output, and included 200W panel, provided its weight suits your backup plan.”
Jackery Explorer 300 Portable Power Station, 292Wh
When a backup station needs to be easy to move and store, the Jackery Explorer 300 offers a more manageable form than the 1000 V2. At about 7.5 pounds and 292Wh, it suits a car kit, short camping trips, and modest outage needs such as keeping phones, lights, and other small devices powered. Its 300W rated output is the decisive limit: unlike the 1000 V2, it is not intended for a broader range of higher-draw appliances.The Explorer 300 has two AC outlets and several charging options, including 100W USB-C PD, two USB-A ports, and a 120W car port. That variety can help keep several small devices going without needing separate adapters. It supports solar charging, with product information indicating about 80% charge in approximately 2.8 hours using a 100W panel. The panel is not included, so its solar setup is less ready out of the box than ZeroKor’s bundled 60W panel or the 1000 V2’s 200W panel.Its listed battery chemistry is LiFePO4, with over 4,000 cycles to 70% capacity. However, the product information gives conflicting weights—7.5 pounds in the description and 7.1 pounds in specifications—so we would treat the exact figure cautiously. Compared with ZeroKor, this is the lighter, clearer fit for portable electronics, but buyers give up the included panel. Choose it for portability, not extended or high-power backup.
Pros:
- Compact, carry-friendly design at roughly 7.5 pounds.
- 292Wh capacity and 300W rated output suit many small-device backup tasks.
- USB-C PD, USB-A, car, and AC outlets support several device types.
- Solar charging is supported, with LiFePO4 chemistry specified.
Cons:
- Solar panel is sold separately, unlike the ZeroKor and 1000 V2 bundles.
- 300W rated output limits which appliances it can run.
- Product information lists conflicting weights of 7.1 and 7.5 pounds.
Best for: Campers, travelers, and households seeking a lightweight station for small electronics, lights, and other compatible low-wattage essentials.
Not ideal for: Buyers who want a solar panel in the box, need more than 300W output, or expect enough stored energy for extended appliance backup.
Bottom line: We recommend it over the heavier 1000 V2 when compactness matters more than appliance headroom, but budget for a separate panel if solar charging is central to your plan.
“We recommend it over the heavier 1000 V2 when compactness matters more than appliance headroom, but budget for a separate panel if solar charging is central to your plan.”
ZeroKor 300W Portable Power Station with 60W Solar Panel
The ZeroKor 300W bundle makes a straightforward case for first-time buyers: the foldable 60W monocrystalline solar panel is included, along with AC, car, and solar charging options. That gives it an out-of-the-box solar advantage over the Explorer 300, whose compatible panel must be purchased separately. Its 300W maximum output and multiple AC, USB, and DC connections are suited to smaller devices and camping gear—not demanding appliances.Against the Jackery 1000 V2, ZeroKor is a much smaller-scale backup choice. The Jackery supplies far more capacity and AC output and includes a 200W panel; ZeroKor’s appeal is a bundled entry point for modest loads rather than extended outage coverage. The panel’s stated 20.5% conversion efficiency is a specification, not a promise of a particular charging time. A 60W panel has limited charging capacity, and sunlight and conditions will affect the energy it produces.A built-in flashlight with reading and SOS modes adds a useful camping detail, while protection features cover short circuits, overload, overheating, and other listed faults. There are meaningful cautions: the solar panel junction box is not waterproof, and the product guidance recommends regular charging and discharging to avoid protection mode. We would choose it over the Explorer 300 only when having a panel included matters more than the Jackery’s specified battery-cycle details and compact, established capacity profile; for higher-power backup, move up to the 1000 V2.
Pros:
- Includes a foldable 60W monocrystalline solar panel.
- Can recharge from AC, a compatible solar panel, or a 12V car port.
- Offers AC, USB, and DC outputs for a range of smaller devices.
- Built-in flashlight includes reading and SOS modes.
Cons:
- 300W maximum output is unsuitable for higher-power appliances.
- The solar panel junction box is not waterproof.
- Product guidance recommends regular charging and discharging to avoid protection mode.
Best for: Campers and first-time buyers who want a small-output station with a solar panel and several charging options included.
Not ideal for: Anyone planning to power higher-wattage appliances, needing substantial outage capacity, or using the panel in wet conditions without protecting its junction box.
Bottom line: We see it as the easiest entry to bundled solar in this group, but its 300W ceiling and 60W panel keep it firmly in the small-device category.
“We see it as the easiest entry to bundled solar in this group, but its 300W ceiling and 60W panel keep it firmly in the small-device category.”
As an Amazon Associate we earn from qualifying purchases.
Before You Start
Decide which devices need backup power and whether they must run at the same time. Find each device’s wattage on its label or manual. For devices with a compressor or motor, such as a refrigerator, check the startup or surge wattage as well as running wattage; the station must support both. Battery capacity is usually listed in watt-hours (Wh), but usable energy may be lower because of conversion losses and reserve limits. Treat the manufacturer’s runtime estimates as estimates, not guarantees.
Use the power station only as described by its manufacturer. Do not use it in rain, standing water, or a closed space where heat can build up. Never backfeed power into a household outlet with a plug-to-plug cable. If you need to power household circuits, have a qualified electrician install an approved transfer switch or other compatible system.
Step-by-Step Instructions
Step 1: List the devices you need to power
Write down each essential device, its wattage, and how many hours per day you expect to use it. Multiply watts by hours to estimate daily energy use in watt-hours. For example, a 10 W light used for 5 hours uses about 50 Wh. Add the estimates for the devices you plan to run, then include extra capacity for conversion losses, changing conditions, and battery reserve.
Check whether any device has a high startup surge. A refrigerator, pump, or power tool can briefly draw much more than its running wattage. If the label does not show surge demand, consult the product manual or manufacturer rather than guessing.
Tip:Separate must-run devices from optional ones. This makes it easier to size the station around real needs rather than trying to run every appliance.
Check: You have a list with a daily Wh estimate and a maximum simultaneous wattage, including known startup surges.
Step 2: Match the station to the load
Compare your estimated energy use with the station’s usable battery capacity, then compare the highest simultaneous load with its continuous AC output rating. Check the surge rating for motor-driven devices. Confirm that the station provides the output types your devices need, such as AC outlets, USB ports, or a 12 V output. Do not exceed the station’s rated output, even briefly, unless its manual explicitly allows the load.
Estimate runtime by dividing usable battery energy by the total watts being drawn. For instance, a 500 Wh usable battery running a 50 W load has a simple theoretical runtime of 10 hours; actual runtime will be lower when conversion losses, temperature, or battery reserve apply.
Tip:Do not compare battery capacity alone. A large battery can still be unsuitable if its output rating is too low for a device’s startup demand.
Check: The station’s usable capacity covers your planned energy need, and its continuous and surge ratings cover the devices you intend to run.
Step 3: Check solar panel compatibility
Read the station’s solar-input specifications and the panel label. Confirm that the panel’s operating voltage and open-circuit voltage fall within the station’s permitted input range, and that the total panel wattage does not exceed its maximum solar input. If using more than one panel, follow the station and panel manuals for series or parallel connections; these arrangements change voltage and current differently.
Confirm that the plugs match and that the correct manufacturer-approved cable is available. Do not assume that panels are compatible because the connectors fit. If a specification is unclear, ask the station or panel manufacturer before connecting the equipment.
Tip:Check open-circuit voltage, not only the panel’s nominal voltage. Cold conditions can raise panel voltage, so stay within the station’s stated limit.
Check: The panel configuration, voltage, wattage, and connector are all within the station manufacturer’s stated requirements.
Step 4: Inspect and position the equipment
Place the station on a firm, dry, well-ventilated surface away from direct heat, flames, and areas where it could be knocked over. Inspect the station, panels, and cables for cracks, fraying, bent pins, dirt, or other damage. Do not use damaged equipment. Keep the station indoors unless its manual gives it an outdoor rating suitable for the conditions.
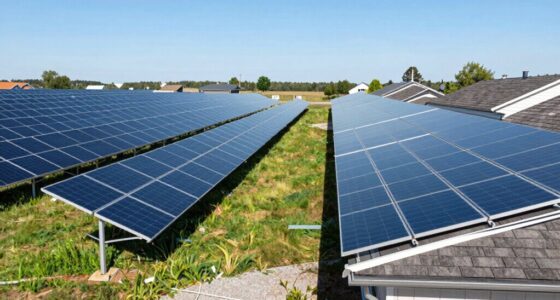
Set the solar panel outdoors where it can receive direct sunlight, away from shade from trees, walls, or chimneys. Secure it against wind and keep it clear of standing water. Leave enough room to reach the station controls and to unplug the solar cable without pulling on the cord.
Tip:Sunlight and shade can change during the day. Choose a position that avoids moving shadows, and follow the panel manual for the allowed angle and handling.
Check: The equipment is undamaged, stable, ventilated, and positioned so the panel receives sunlight without exposing unrated equipment to weather.
Step 5: Connect the solar panel to the station
Turn off the station’s solar input or follow the connection order in its manual. With the panel positioned safely, connect the approved cable to the panel and then to the station’s solar input, using the specified order and adapter. Do not connect or disconnect plugs with wet hands, and do not touch exposed electrical contacts. Turn on the solar input if the station requires it.
Check the display for solar input power, charging status, and any warning message. If no input appears, disconnect the panel using the manual’s procedure and recheck sunlight, cable seating, connector type, and the panel configuration. Do not improvise wiring to make the connection work.
Tip:Some stations require a minimum input voltage before charging begins. Low light, shade, or a panel aimed away from the sun can keep the input below that threshold.
Check: The display shows solar charging or a positive solar input reading, with no fault or over-voltage warning.
Step 6: Charge the battery and monitor it
Let the station charge in a location and temperature range permitted by its manual. Monitor the display for battery percentage, input power, and temperature warnings. Solar output changes with clouds, panel angle, season, and shade, so a charging estimate can rise or fall. Keep ventilation openings clear and do not cover the station while it is operating.
Charge to the level you need for the planned outage. If the manufacturer recommends a particular storage charge level for long-term storage, follow that guidance after the immediate backup need has passed.
Tip:A panel’s advertised wattage is a laboratory rating, not a promise of continuous output outdoors. Plan for lower real-world production and keep a secondary charging option if reliable backup is needed.
Check: The battery reaches your planned charge level and the station reports no temperature, charging, or battery fault.
Step 7: Connect and test the essential devices
Turn on the station output you need, then connect one device at a time. Check the station display after each connection for load wattage, overload warnings, and remaining runtime. Test high-startup devices individually before relying on them during an outage. If the station alarms, shuts down, or reports an overload, unplug the last device and reassess its running and surge demand.
Run the selected devices long enough to confirm they operate normally. Keep the station’s ventilation clear and monitor the battery level. Do not connect the station to household wiring through an ordinary outlet or an unapproved cable.
Tip:Test a medical device only in line with its manufacturer’s instructions and any backup-power guidance from the care provider. Keep a separate backup plan if interruption could create a health risk.
Check: Each planned device runs without an overload alarm, and the displayed load and battery behavior are consistent with your estimates.
Step 8: Record the setup and store it safely
Write down the panel configuration, cable and adapter used, devices tested, observed power draw, and approximate runtime. Store the manuals and cables with the station so you can repeat the setup. After testing, switch off outputs and disconnect panels in the order specified by the manual.
Store the station at the charge level and temperature recommended by its manufacturer. Inspect and recharge it on the schedule in the manual. Keep panels, cables, and the station clean and dry, and replace damaged parts with approved components.
Tip:Repeat a short test before storm season or another period when backup power may be needed. A stored station can lose charge over time.
Check: You can reproduce the setup from your notes, and the station is stored within the manufacturer’s stated conditions.
Common Mistakes to Avoid
- Choosing a station based only on its battery capacity. — Check usable Wh, continuous output, surge rating, outlet types, and the combined load of devices running at the same time.
- Connecting panels that exceed the station’s solar-input limits. — Compare panel voltage, open-circuit voltage, total wattage, and connector requirements with the station manual before plugging in.
- Expecting the panel’s rated wattage throughout the day. — Allow for clouds, shade, panel angle, season, and charging losses; plan a backup charging method when dependable power matters.
- Trying to power house circuits by plugging the station into a wall outlet. — Use standalone devices plugged directly into the station, or ask a qualified electrician about a manufacturer-compatible transfer setup.
Troubleshooting
Problem: The station does not show solar input.
Solution: Check that the panel is in direct sunlight, remove shade, reseat the approved cable, and confirm the input is enabled. Verify the panel voltage and configuration against the manual. Stop if the display shows a fault or if compatibility is uncertain.
Problem: Charging is much slower than expected.
Solution: Check for cloud cover, shade, a poor panel angle, dirty panel surfaces, or a cable or adapter issue. Compare the display’s input wattage with conditions at the panel, and remember that rated panel output is not guaranteed outdoors.
Problem: The station shuts down or displays an overload warning.
Solution: Disconnect devices and reconnect them one at a time. Check total continuous wattage and startup surge against the station ratings. Reduce the load or use a station rated for the demand.
Problem: A device will not run even though the station has charge.
Solution: Confirm that the correct output is switched on and that the device’s plug and voltage match that output. Try a lower-power device to test the outlet. If the station reports a fault, stop using that output and contact the manufacturer.
What Success Looks Like
The setup is ready when the solar panel charges the station without warnings, the battery reaches your planned reserve, and every intended device runs within the station’s continuous and surge limits. You should have a written estimate of expected runtime, know which devices take priority, and be able to reconnect the equipment using the approved cables and manual. The station must remain unconnected to household wiring unless a compatible, approved transfer system has been installed.
Next Steps
Keep the station and panels accessible, store cables together, and follow the manufacturer’s schedule for inspection, charging, and battery storage. Repeat the device test periodically and after changing the panel configuration or adding a device. Before an outage, charge the battery, check the panel and cables, and decide which loads can be switched off to extend runtime. If you need to power fixed household circuits, consult a qualified electrician about an approved transfer switch and a system rated for those circuits.
Frequently Asked Questions
How many solar panels do I need?
Start with the station’s maximum solar-input rating and the energy you want to replace each day. Panel count depends on each panel’s wattage and the sunlight available where you use it. Confirm that the combined voltage and wattage stay within the station’s limits; adding panels does not help if the input is capped or incompatible.
Can a solar power station run a refrigerator?
It may, if the station supports the refrigerator’s running wattage and startup surge and has enough usable energy for the planned runtime. Check the refrigerator label or manual, then test it while monitoring the station. A refrigerator may cycle on and off, so actual energy use depends on temperature, contents, and how often the door opens.
Can I use the station indoors?
Use it indoors only if the manufacturer permits indoor operation and the location meets the manual’s ventilation and temperature guidance. Keep it away from moisture, heat, and blocked vents. Solar panels generally need to be placed outdoors in sunlight and connected with the approved cable.
Can I leave the solar panel connected all day?
Follow the station manual. Many stations manage charging automatically, but temperature limits, rain exposure, and connector instructions still apply. Do not leave equipment outside in conditions beyond its ratings, and check the display for charging or temperature warnings.
Will a solar power station power my whole home?
A portable station usually powers selected devices through its own outlets, not an entire home’s wiring. Whole-home or circuit backup needs equipment sized for the loads and an approved transfer method installed as required by local electrical rules. Never feed power into a wall outlet with a plug-to-plug cable.
Fall Picks
fall essentials
As an affiliate, we earn on qualifying purchases.