To fix a dead outlet, start by turning off the power and checking for loose or corroded wiring and physical damage. Confirm if the outlet has power with a tester and inspect for tripped breakers or GFCIs that need resetting. Follow the wiring from the breaker to identify faults or loose connections. Finally, replace or repair the outlet and test it again. Keep going, and you’ll discover detailed steps to restore your outlet safely and effectively.
Key Takeaways
- Turn off power and inspect wiring for loose, corroded, or damaged connections before any work begins.
- Use voltage testers or multimeters to verify power supply and identify wiring faults or lack of voltage.
- Check circuit breakers and GFCIs; reset tripped devices and confirm proper circuit function.
- Follow wiring diagrams and inspect the entire circuit path for loose, damaged, or overheated components.
- Carefully replace or repair the outlet, ensuring secure wiring connections, then test for proper operation before restoring power.

Klein Tools RT250 GFCI Outlet Tester with LCD Display, Electric Voltage Tester for Standard 3-Wire 120V Electrical Receptacles
CLEAR LCD READOUT: GFCI Receptacle Tester features a large backlit LCD readout for easy voltage reading and clear…
As an affiliate, we earn on qualifying purchases.
As an affiliate, we earn on qualifying purchases.
Initial Safety Checks and Visual Inspection

Have you ever wondered what the first step is when troubleshooting a dead outlet? It starts with safety checks and a visual inspection. Turn off the power at the breaker to avoid shocks. Look closely at the outlet and surrounding area for signs of grounding issues, such as loose or damaged connections. Check for moisture intrusion, which can cause corrosion or short circuits, especially in humid environments. Inspect the outlet for burn marks, discoloration, or any physical damage. Examine the wiring for loose or disconnected wires. If you notice any corrosion or moisture, it’s a clear sign to address these issues before proceeding. A thorough visual inspection helps identify obvious problems and ensures safety before testing or making repairs. Additionally, understanding common electrical hazards can help prevent future issues and ensure safe troubleshooting. Being aware of proper safety procedures is crucial to avoid injury during electrical repairs. Recognizing signs of damage or wear can guide you in deciding whether to repair or replace the outlet for safety and functionality. Moreover, knowing about electrical codes and standards can help ensure your repairs meet safety regulations and prevent future hazards. It’s also beneficial to use appropriate tools and equipment to accurately diagnose electrical problems and avoid further damage.

KAIWEETS Circuit Breaker Finder Tool Kit, GFCI Outlet Tester with Dual-Sided LED Indicators, Electrical Circuit Tracer Tool with Flashlight, Includes Carrying Case and Adapters- KT302P
All-in-One Circuit Diagnosis: The KT302P Circuit Breaker Finder is designed for fast, intuitive troubleshooting. It easily locates breakers,…
As an affiliate, we earn on qualifying purchases.
As an affiliate, we earn on qualifying purchases.
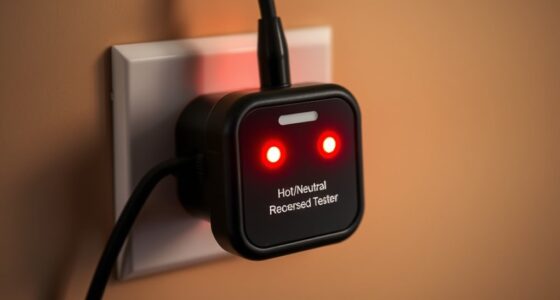
Confirming Power Supply and Testing the Outlet

Before testing the outlet, you need to confirm that it’s receiving power. Use a reliable voltage tester or multimeter to check for voltage. If there’s no power, suspect grounding issues or a tripped breaker. Power surges can also damage outlets or cause them to stop working, so consider if recent surges could be be the cause. Make sure the circuit breaker hasn’t tripped and that the GFCI outlets aren’t reset or tripped, which could cut power supply. If the outlet tests live but still doesn’t work, verify that your tester is functioning correctly by testing a different outlet. Confirming the power supply guarantees you’re not troubleshooting a non-issue and helps identify potential grounding problems or damage from power surges that might affect the outlet’s operation. Checking the filtration system of your paint sprayer can prevent contamination that might also affect electrical components. Additionally, understanding AI’s role in healthcare can enhance diagnostic accuracy and maintenance procedures for electrical systems in medical equipment. Furthermore, staying aware of data privacy challenges ensures that any smart testing devices used comply with security standards. Properly diagnosing electrical issues also involves understanding grounding problems, which can prevent future malfunctions and ensure safety. Being mindful of electrical safety protocols can further reduce the risk of accidents during troubleshooting.
Klein Tools RT250 GFCI Outlet Tester with LCD Display, Electric Voltage Tester for Standard 3-Wire 120V Electrical Receptacles
CLEAR LCD READOUT: GFCI Receptacle Tester features a large backlit LCD readout for easy voltage reading and clear…
As an affiliate, we earn on qualifying purchases.
As an affiliate, we earn on qualifying purchases.
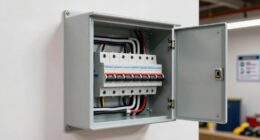
Tripping Circuit Breakers and Resetting GFCIs

If your outlet still isn’t working after confirming the power supply and testing the outlet, the issue might stem from a tripped circuit breaker or a reset-needed GFCI outlet. A ground fault can cause a GFCI to trip, cutting power to prevent shocks or fires. Check your breaker box for a breaker that’s in the off position or has a visible trip indicator. Resetting the breaker involves flipping it fully off then back on. For GFCIs, press the reset button firmly; it should click and restore power. Be cautious and ensure no ground fault exists before resetting. Understanding ground fault protection can help prevent future issues and enhance electrical safety. Regular maintenance and awareness of circuit breaker operation can help avoid unexpected outages and improve overall electrical safety. Additionally, staying informed about electrical safety practices can further reduce risks associated with electrical systems. If the breaker trips again or the GFCI won’t reset, it indicates a deeper electrical problem requiring professional inspection. Additionally, inspecting for wiring issues can prevent recurrent faults. Being vigilant about ground fault detection can help identify issues early and avoid safety hazards.

Klein Tools 69149P Electrical Test Kit with Digital Multimeter, Non-Contact Voltage Tester and Electrical Outlet Tester, Leads and Batteries
VERSATILE MULTIMETER: Measures up to 600V AC/DC voltage, 10A DC current, and 2MOhms resistance
As an affiliate, we earn on qualifying purchases.
As an affiliate, we earn on qualifying purchases.
Locating and Inspecting the Outlet’s Circuit Path
To effectively troubleshoot your outlet, you need to locate and inspect the circuit path that supplies power to it. Start by consulting wiring diagrams to understand how the circuit is wired, including the connections between outlets, switches, and the breaker panel. Pay close attention to grounding issues, as improper grounding can cause outlets to malfunction or become dead. Carefully follow the wiring from the breaker to the outlet, checking for loose or damaged connections, corrosion, or signs of wear. Use a voltage tester or multimeter to verify power flow along the circuit path. Identifying grounding problems or faulty wiring in the circuit can often explain why your outlet isn’t working, helping you target your repairs accurately and safely. Additionally, inspecting the circuit for air purifier maintenance issues such as dust accumulation or filter blockages can prevent overheating or electrical faults that may affect outlet performance. Regularly reviewing your electrical system and ensuring connections are secure and free from corrosion or wear can also help prevent future issues and ensure safety. Monitoring circuit breaker performance and resetting it properly can further ensure the circuit functions correctly, especially considering the importance of proper somatic awareness in maintaining overall electrical safety.
Testing for Faults and Analyzing Wiring Conditions

To diagnose a dead outlet, start by inspecting the outlet connections for loose or damaged wires. Then, use a voltage tester to verify if power is reaching the outlet, and check circuit continuity to identify breaks in the wiring. These steps help pinpoint faults and guarantee your wiring is in good condition before making repairs. Using a best airless paint sprayer can also be a helpful alternative for efficient and smooth application once electrical issues are resolved. Understanding performance tuning principles can ensure your electrical system is optimized for safety and efficiency during repairs. Additionally, considering the application of Glycolic Acid in relevant areas can promote better skin health which might be beneficial for those working in related environments. Incorporating vegetable juices into your diet may support overall wellness, aiding in recovery and energy levels during repair projects.
Inspect Outlet Connections
Before testing your outlet connections, it’s important to turn off the power at the circuit breaker to guarantee safety. When inspecting, examine the wiring for wire connector issues, such as loose or corroded connections, which can cause power failure. Check the outlet mounting to ensure it’s secure and properly aligned within the wall box. Loose outlet mounting can lead to poor contact and faulty operation. Remove the outlet cover carefully, then carefully pull out the outlet to inspect the wiring. Look for damaged or disconnected wires, and verify that all wire connectors are tight and intact. Properly secured connections prevent arcing and ensure safe, reliable operation. Additionally, reviewing the Kia Tuning options for performance upgrades can help in understanding how electrical systems are optimized for vehicle performance. Ensuring the electrical connections are in good condition is also crucial for compliance with Gold IRA regulations and safe handling of investments. Address any issues you find before proceeding to further testing or repairs.
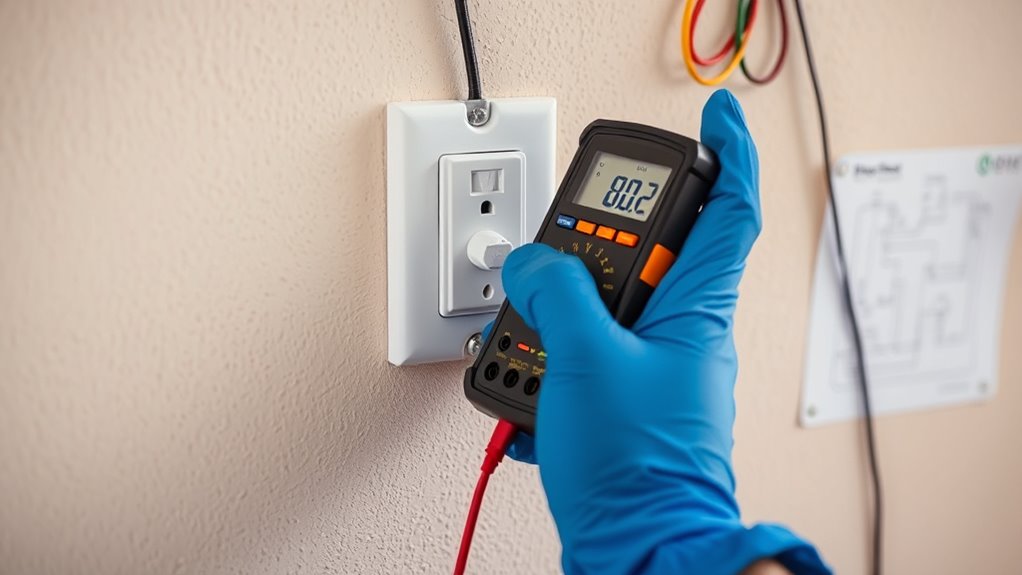
Use Voltage Tester
Are you ready to test your outlet for faults? Using a voltage tester is essential for accurate outlet diagnostics. Carefully turn off the power and insert your tester into the outlet. If the tester shows no voltage, it indicates a fault or wiring issue. Never ignore these signs—testing helps you identify problems early. To clarify your feelings, consider this:
| Safe & Confident | Cautious & Concerned | Frustrated & Curious |
|---|---|---|
| You’re in control | You’re worried but cautious | You want answers now |
| Ready to fix | Doubting yourself | Overwhelmed by options |
| Confident in knowledge | Seeking reassurance | Looking for guidance |
Check Circuit Continuity
Checking circuit continuity is a crucial step in diagnosing outlet problems because it helps you determine if the wiring is complete and functioning properly. Using a continuity tester or multimeter, you can identify faults or broken wires that cause dead outlets. Start by disconnecting power and consulting wiring diagrams to understand the wiring layout. Pay special attention to grounding issues, as poor grounding can lead to outlet failure or safety hazards. When testing, confirm that the circuit is de-energized to avoid shocks. If the tester shows no continuity where it should, you’ll need to inspect and repair the wiring. Properly analyzing wiring conditions ensures that faults are identified quickly, preventing future electrical problems and ensuring your outlet works safely and reliably.
Repairing or Replacing the Outlet and Final Testing

Once you’ve identified the faulty outlet, the next step is to repair or replace it properly. Start by turning off the power at the breaker and removing the outlet cover. When replacing the outlet, consider the outlet aesthetics to ensure it matches your room’s decor. Check that the outlet location is appropriate — avoid areas prone to moisture or damage. Disconnect the wires carefully, then connect the new outlet securely, following color-coding standards. Before screwing the outlet back into the box, double-check that all connections are tight and correct. Once installed, turn the power back on and perform final testing with a voltage tester or outlet tester. Confirm the outlet functions properly and that no issues remain, guaranteeing safety and reliability.
Frequently Asked Questions
How Long Does a Typical Outlet Repair Take?
A typical outlet repair takes about 30 minutes to an hour. You’ll need to turn off the circuit breaker before inspecting the electrical wiring for damage or loose connections. Replacing or fixing the outlet usually involves disconnecting the wiring, attaching it to the new outlet, and testing the circuit. If the circuit breaker trips or wiring issues are complex, it might take longer, but most repairs are quick and straightforward.
What Safety Gear Is Recommended During Troubleshooting?
Did you know that electrical accidents often occur due to inadequate safety gear? When troubleshooting, always wear proper personal protective equipment and electrical safety gear, such as insulated gloves and safety glasses. These protect you from shocks and sparks. Always turn off power before working, and double-check with a tester. Prioritizing safety gear minimizes risk, ensuring you stay safe while diagnosing and fixing outlets.
Can I Fix a Dead Outlet Myself Safely?
Yes, you can fix a dead outlet yourself if you follow DIY electrical safety guidelines and outlet troubleshooting tips carefully. Always turn off the power at the breaker before starting, use insulated tools, and wear safety gear like gloves and goggles. If you’re unsure or uncomfortable, it’s safer to call a professional. Remember, proper precautions protect you from electrical shocks and potential hazards during outlet repairs.
When Should I Call a Professional Electrician?
When your DIY attempts hit a wall or sparks start flying, it’s time to call a professional electrician. Don’t risk violating the electrical code or creating DIY pitfalls that could turn your home into a firework show—unintended. If you’ve tried fixing that dead outlet and it still doesn’t work, or you’re unsure about wiring, leave it to the pros. Safety’s worth more than a cheap fix gone wrong.
Are There Any Common Causes for Outlet Failures?
Common causes for outlet failures include electrical surges that overload the circuit and wiring issues like loose or damaged connections. You might notice an outlet that stops working after a power surge or if the wiring wasn’t installed correctly. Over time, wear and tear can also lead to faults. If you suspect any of these causes, it’s best to call a professional electrician to inspect and fix the problem safely.
Conclusion
By following these six steps, you can safely troubleshoot a dead outlet and restore power efficiently. Remember, over 60% of electrical issues are caused by simple wiring faults or tripped breakers, making proper inspection vital. Taking your time and carefully testing each component ensures safety and saves you money on unnecessary repairs. With patience and attention to detail, you’ll confidently diagnose and fix outlet problems, keeping your home safe and functional.